Jet Bridge Prop Pack V2.0 (Base Pack)
This is a collection of prop assets to create realistic looking airport jetbridges. It should be noted that these assets are much higher poly than my original assets. If you would prefer lower poly assets instead, you can find them here:
This is the base collection for a few variations, whose links will be below:
- Paneled Jet Bridges (this pack)
- Corrugated Jet Bridges
- Glass Jet Bridges
I will be adding pre-fab jet bridge buildings to my workshop in the near future, so that you you will not have to place all of the parts for common aircraft.
All of the models (including ones in the other sets) use the same textures. For detail reasons, I decided to stick with a 1024×1024 texture (diffuse, specular, normal), and a 128×128 LOD texture (diffuse, specular).
I am not going to list the tri count for each part, however, all of the parts are at or below 400 Tris, and have much lower tri LOD. With that said, however, a single, complete jetbridge, will most likely have around 2.5K Tris.
A note on the file size: If you use the advanced loading screen mod, all of the assets in this pack should only take up significantly less memory (I have not calculated it) – Keep in mind that by default Cities Skylines puts all of the texture files in every asset (which are not needed if you have one copy in memory).
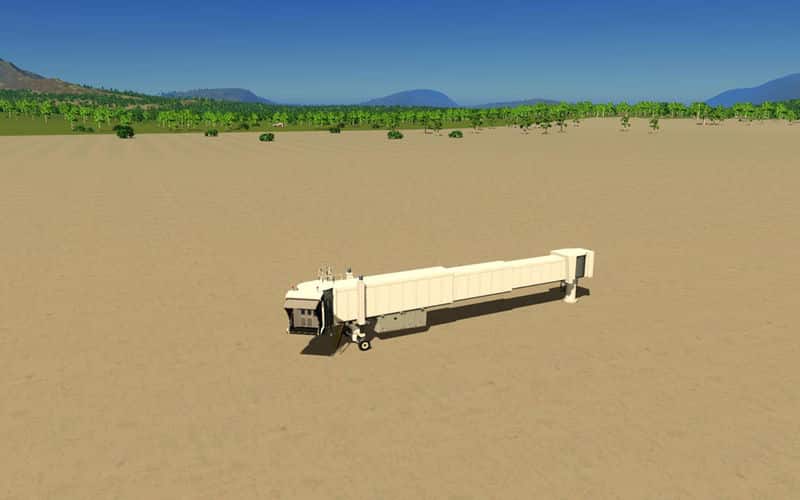
I would like to give a brief note on operation and terminology related to these assets, since it will make referencing the individual ones easier.
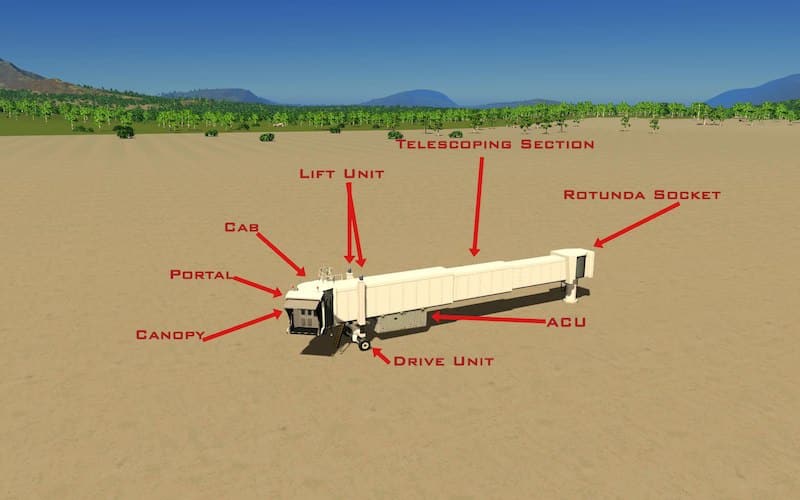
There is a labeled image in the uploaded images.
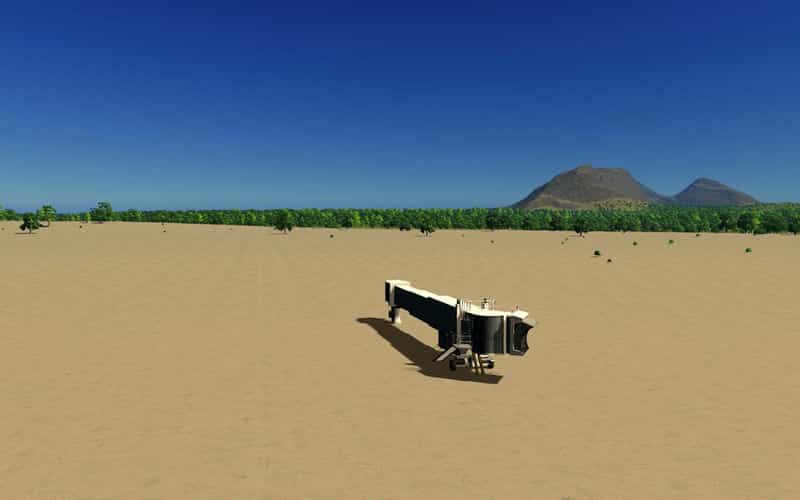
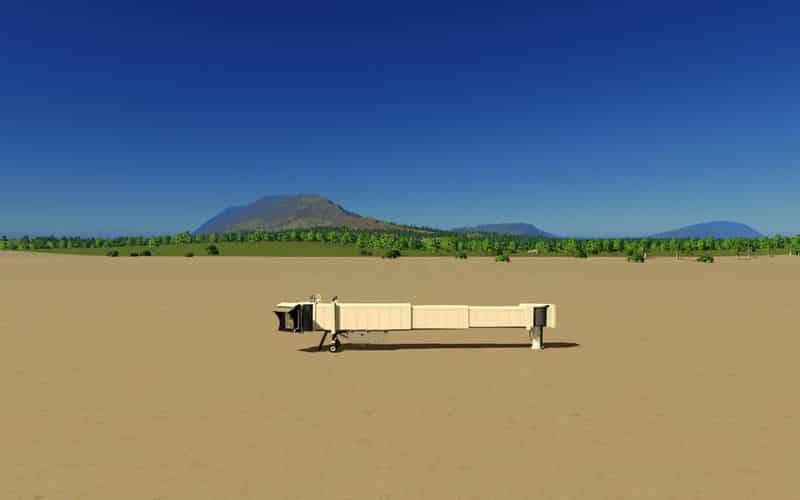
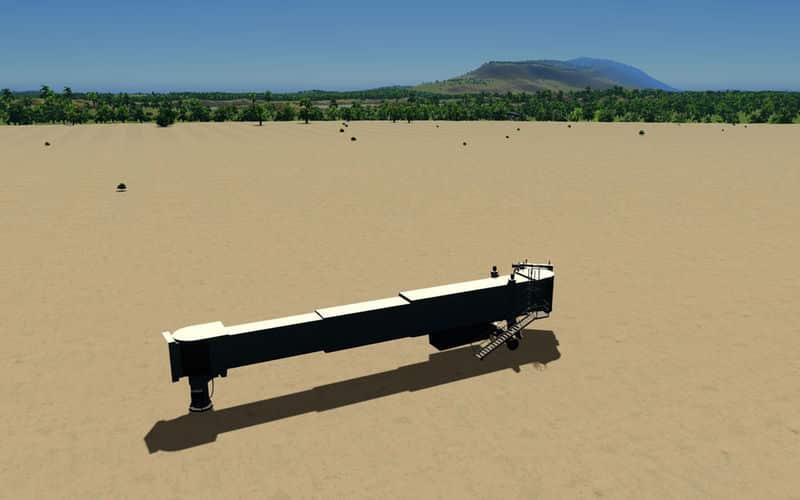
A Jetbridge will typically consist of:
1) A base point where it can pivot, which is called a rotunda socket. This socket allows the bridge to pivot on 2 axis – yaw and pitch.
2) A telescoping section which allows the bridge to expand in length. Note the order of the telescoping parts… The smaller one is attached to the rotunda socket and the sections increase in size going down the bridge.
3) A cab, which contains another rotunda-like socket. This cab will often have a service stairwell on the outside which goes down to ground level (for crew and ground personnel). Additionally, the cab is where the jet bridge operator will stand while moving the bridge into position.
4) A portal which rotates around the cab’s rotunda socket. This contains the door / boarding platform, and a window for the jet bridge operator to see out of.
5) A cloth canopy which is attached to the portal. This canopy is extended over the aircraft when the bridge is moved into place. This is meant to protect the passengers and crew from the elements (i.e. rain / snow).
6) A drive unit which contains two wheels. These will be located on the biggest part of the telescoping arm, and are what support the non-base end of the bridge, as well as allow it to move into position. Additionally, these contain “pistons” which can change the elevation of the bridge end (for different height aircraft). In reality, these are most likely screw gears and not pistons.
And finally, Optionally 7) An Aircraft Cooling Unit (ACU), which is either suspended below or sits above the largest telescoping section of the bridge. It will be place above when the bridge starts at ground level, otherwise it will be placed below.
All angles listed are in degrees
- ACU (Angles: -4, -2, 0, 2, 3, 4, 5)
- ACU Hose top mount (for top mounted ACUs)
[*[ ACU Hose under mount (for under mounted ACUs) - Rotunda Sockets (ground level, 3m, 4m, 8m)
- Cab (with lights added)
- Drive (the drive section of the drive unit)
- Lifter (the part of the drive unit that lifts the jet bridge)
- Portal (with lights)
- Pillar (for extended walkways, which can be composed of jetbridge telescoping sections)
- End Cap (for extended walkyways)
- Rotunda Door (the part that connects the base rotunda socket to a walkway or to the terminal)
- Plated Rotunda End (0,1,2,3,4,5) – smallest telescoping part
- Plated Cab End (0,1,2,3,4,5) – largest telescoping part
- Plated Midsection (0,1,2,3,4,5) – middle telescoping part
- Stairs (Heights for B737, A32X, B777, E145)
- Canopys (resting, A321X, B777, E145)
– The canopys are not attached to the portals, which allows you to pick a canopy for your specific situation
– When an aircraft is not docked with the jet bridge, the canopy should be in the “resting” state. Most canopys do not have curvature built into them, so they end up being flat when there is nothing pressing against them.
– The portals have their pivot point off-center intentionally. This allows you to place the pivot point (the “center” of the selector) over the center of the cab. When you have it aligned correctly, you can simply rotate the portal, and it will rotate perfectly around the cab (in a perfect circle)!
– The lift portion of the drive unit has a z offset, such that it will have a default position which is the lowest point the jetbridge can reach. For shorter aircraft this means you don’t have to move the lift portion up, but you can lift it up for taller aircraft!
– The ACU hoses and ACU were designed so that the hoses should fit directly into the protruding ducts on the front part of the ACU (which will help you determine which direction the ACU should face).
– The large telescoping sections have mounts under them for the ACU, which can help you position it. Additionally, the drive units are typically between the ACU and the cab.
– The service stairs clip halfway through the ground, and need to be moved up to be seen. However, this allows you to use taller stairs for shorter aircraft by clipping the extra part of the stairs in the ground.
– Finally, all of the telescoping pieces are symmetric, so that a 2 degree one is both 2 degrees and -2 degrees.
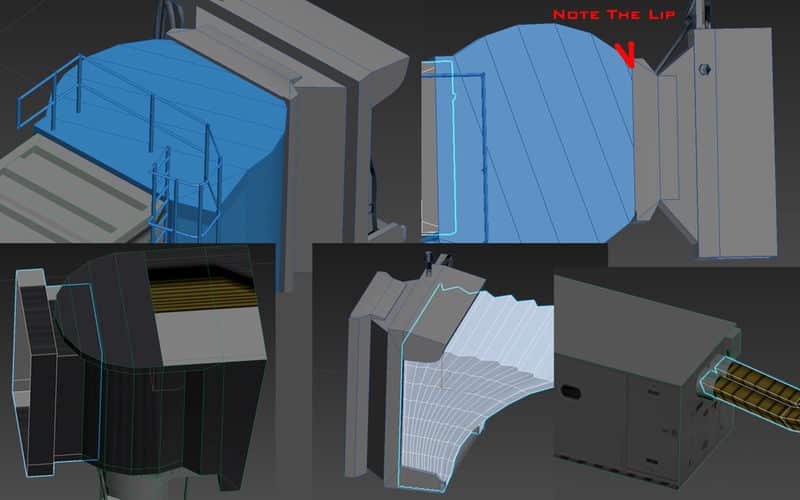
I have included some screen shots of the model which show how some of the parts are intended to clip together. They are using the first pass models, with incorrect texture mapping / no texture (not the ones in the pack), but are the same size. Additionally, some of the parts are selected in the 3D editor to give them an outline, which allows you to see how far they would be clipped into other parts.
For the stairs:
- B737 – should be the same height for ERJ-175, and ERJ-195s
- A32X – A320, A321, and B757 height
- B777 – Should be roughly the same height as the B787, B747, B767, A350, A330 (possibly A380 too)
- E145 – same height as the ERJ-135, should also be the same height as the CRJ-900
For the canopys:
- A321X – should work on all smaller aircraft (A320/A321/737/757/ERJ-175/ERJ-195)
- B777 – should work on all larger aircraft (B767,B747,A330,A350,B787,A380)
- E145 – should work on all small aircraft (ERJ-145, ERJ-135, CRJ-900).
– If anyone would like me to add a version of the portal without the red lights, please let me know in the comments (unfortunately the blinking ones are the only ones that can be placed in the game with the correct intensity).
– If you have an aircraft which won’t work with included canopys / stairs, and would like me to add a version for that one, please let me know in the comments (it needs to be one that you can find relatively good scaled 3-views of, so that I can make a proxy model).
- 737 Short:
- A32X Short: